Sunday 17 March 2013

Still winter? Embrace it. With shepherd's pie.


Hi!

It's been too long. I know. These things happen. Life gets in the way. 

It's good to be back!

I hope 2013 has kicked off well for everyone. If you happen to live in The UK, you will have had to deal with the usual weather-based roller coaster ride, including that light dusting of snow we had in January. I hope you took the opportunity to spend the weekend outside and give your inner child free reign for a little while. I went sledging with friends on Hampstead Heath. It was a ton of fun, and served as one of the many weekly reminders of why I love London so much.

But can I just have a little rant? Just a small one. It'll be over in seconds, I promise.

Guys, it's March. And I'm so ready for winter to be over. And it's not. 

The truth is, the only time I like winter is when it's snowing. Unfortunately, here in London, right around the time you need to get anywhere, the cons of snow far outweigh the pros. So unless I move to Michigan, Canada or Hokkaido (all places I wouldn't mind staying, fyi), where they do winter better, I'll just have to suck it up, deal with the Seasonal Affective Disorder (otherwise known as SAD. SO SAAAAAAD), and eat. Especially starchy winter comfort food. So I figured…. shepherds pie.

One Friday evening in January/February (I forget..), Adam and I joined forces and made the best veggie shepherds pie there ever was. 

Turns out he makes excellent mashed potatoes. Who knew?


I did the bottom bit, with onion, carrots and celery, then little minced 'shrooms, veggie mince, some veggie stock, and a spoonful of Marmite. I know, it's controversial, but it is after all a tried and tested way of adding that certain something (I believe it's called umami in the fancy-pants culinary world) to certain dishes. I love Marmite. Adam hates it. So I had to convince him that the end product would in no way taste like Marmite. We also poured in a swig of red wine… for good luck. 

The wine was essential.
Ready for potato-ing.
Action shot.


I suppose at this point you might have guessed that this did not come from a cookbook. Freestylin'.

We finished the whole thing off by sprinkling a bit of grated cheddar over it. In Adam's words, it elevates the dish from "Oh. Shepherds pie." to "Ooohhhhh, SHEPHERDS PIE." He wasn't wrong.


Phone cam photo does not do it justice.

Then I almost dropped it all on the floor. But let's not get into that part too much. 


It was amazing. We sat down and plowed through two helpings. And then we fell asleep watching X Men: First Class. Wine may or may not have been involved. 

You will need:

- 1 onion, finely chopped

- 2-3 cloves of garlic, finely chopped

- 2 carrots, finely chopped

- 2 sticks of celery, finely chopped

- 250g baby button mushrooms, finely chopped

- 300g vegetarian mince (e.g. Quorn. Mmmm Quorn...)

- 500ml vegetable stock

- 1 can chopped tomato

- 1 tbsp tomato puree

- 1/2 - 1 tbsp marmite (just do what feels right, I don't want to be responsible for marmite-based sadness)

- salt and pepper to taste

- 1.5kg waxy potatoes, cut into halves or quarters depending on their size 

- mashing accoutrements, e.g. milk, butter

- 1tsp thyme, for the potatoes 

- a bit (or a lot, you're the cheese boss) of mature cheddar cheese, grated

How you do:

Heat some olive oil in a large pot, then toss in the onion and garlic. Cook over medium heat until the onions are translucent, then add the carrots and celery. Cover and let them cook for about 8 minutes, stirring occasionally.

Meanwhile, add some butter and a bit of olive oil to a medium sized pan. This is the mushroom browning pan. Fry the mushrooms, stirring frequently, until all the liquid has evaporated and the mushrooms are nicely browned. Take them off the heat.

Next, add the veggie mince to the big pot. Add some more oil if needed. Also, veggie mince tends to stick the the bottom of the pot/pan, so constant stirring is important. Incorporate it into the carrot-celery-onion mixture, and stir until it is no longer frozen and a bit browned. Add the mushrooms. At this point you may wish to season it with a bit of pepper and/or salt.

Now add the can of chopped tomatoes, tomato puree, and the vegetable stock. Stir it all together. Okay, it's time for that marmite. Do it. Now cover and let it simmer for a good 15-20 minutes.

It's time to get to work on the potatoes. Put them in a pot of suitable size, and cover them completely in cold water. Bring the water to boil, turn down the heat a bit, and cook them until they're soft all the way through. When the time has come, drain them and get to work mashing. Add a bit of milk, a bit of butter, until the mash is creamy. Add the thyme.

Now the time has come to assemble! Spread the mince filling (which at this point should be thick, never watery, and if it still is, leave it to bubble for a bit longer) evenly into a casserole dish. Now top it evenly with the mash. Stick it in the oven,  and cook it at 200C for 10 minutes or so. THEN, take the whole thing out and sprinkle it with the cheddar, and put it under the grill until the top is slightly browned and the cheese is all melty.

Tuck in. (Maybe winter isn't so bad after all.)


Friday 2 November 2012

Making sushi (and shamelessly plugging German cinema) in Berlin.


It's half-term. I'm in Berlin. Ah, the perks of working in a primary school.

I've had a pretty awesome week. I saw my sister again (for the first time in almost a year!), went for long walks, read a German book, spent a good two hours gawping at paintings at the Neue Nationalgallerie, ate all the cheese in my parents house, and had a drink or ten with a good friend. And I went to the cinema. Twice.

I try to go to the cinema at least once when I'm here, because it's cheap and I finally get my pick of German movies on the big screen, instead of having to wait and see what filters through to the cinemas of Britain. Like every country, Germany has its fair share of shite, but there are many genuinely amazing films that just never make it into theatres anywhere else. This time 'round I watched Die Wand (The Wall). Allow me to gush for a moment... It was amazing. Martina Gedeck (of The Lives of Others and The Baader-Meinhof Complex fame) was beyond brilliant- as the only human protagonist, she pretty much carried the film. I highly recommend seeing it if you want something very different, and/or if you like your movies on the depressing side. I know I do.

However, the need for a bit of balance (and my dad's suggestion) compelled me to also go watch a sweet little film called Sushi in Suhl, which is based on a true story, yo! Apparently, in the 1970s, in a town called Suhl in the GDR (that's East Germany, guys), a chef working in one of the local taverns developed a keen interest in Japanese cuisine. So, despite never having been to Japan or ever having tasted Japanese food before, and armed with a few recipes from a book (propaganda ministry approved, I would imagine), he set about cooking a full Japanese meal for his friends. They liked it, but they all thought he was bonkers. Despite warnings of the potential political shitstorm it might cause, he opened a little Japanese restaurant, which apparently became quite a phenomenon in that little isolated corner of the world. 

Yeah they made a movie about this. 

While the film was cute, it mainly just left me with one hell of a craving for Japanese food. So I put my mum's giant shiny kitchen to use and made sushi for the family. 

See, there was a food-based point to all this! (Kind of.) And now, for lots and lots of photos.

Ingredients, yo.

Multitasking.

Fillings! Salmon, tuna, smoked tofu, sweet potato puree, natto, cucumber. (Not pictured: mountain of avocado).

 If you own a rice cooker, sushi rice really is super duper easy. All you need then is some Japanese short grain rice (you will not be able to make sushi with long grain rice, it's just not sticky enough), well-washed. I used 3 cups this time, because that's all we had left, but I've been known to make 6 cups worth, because sushi has the tendency to get eaten pretty fast.

To the cooked rice I gradually added rice vinegar, about 1/4 cup, with 1 tbsp sugar and 1 1/2 tsp salt dissolved in it (apparently some people gently heat the vinegar until it dissolves but I think that step is redundant, give it a good stir and it'll dissolve without the heat). Again, here quantities do vary, and I recommend adding the vinegar mix gradually, and taste as you incorporate it into the rice.

Use either a wooden or ceramic bowl for the rice, and incorporate the vinegar into the rice with a rice paddle in a cutting motion (no stirring). If you really want to test your multitasking skills, fan the rice to cool it down while you mix. Or get someone else involved. Teamwork, guys!

Once your rice is all sushi-vinegared up and somewhat cooler, take a small mound (you really don't need much, maybe the equivalent of the size of your palm), put it in the middle of your nori, which you have placed squarely onto your little bamboo rolling thingy, and use the rice paddle to spread it outwards, until you've covered most of the nori. Note that my rolling thingy in the photo isn't bamboo, it's "dishwasher-friendly" rubber, but it just didn't work as well. So ignore it, and never buy one.

Then you start with the fillings. Don't put them squarely in the middle, start by placing them at the end closest to you, that way it's easier to roll.

The filling in the roll pictured here is definitely a bit too much in the middle, but I like to live dangerously.

Put in whatever your little heart desires.

We all know that sushi is not limited to fish and cucumber. In fact, this was the first time I ever used raw fish. This is because a) I can't normally justify paying for it, and b) it wouldn't get eaten by as many people if I did.

Fillings I've used in the past include:
- cream cheese.
- pesto.
- tuna mayonnaise.
- Japanese plum paste.
- carrot and peppers.
- Sriracha sauce, in place of wasabi.


You get the idea. Anything goes really. The only constant for me is a sh*t-ton of avocado. That's non-negotiable.


 When rolling your sushi up, roll the end closest to you away from you, so that the end-side is just touching the rice, and press the sides gently to shape it. Then roll it up completely and press the whole thing to shape it, the bamboo roll will make it almost a bit square.

When cutting the sushi, I cut the ends off first, then down the middle, and each half will equal about 3 pieces.

Find a friend to cut with you, it gets a bit dull after awhile, plus you'll have someone to eat the ends bits with.


We had the leftover fish as sashimi, and dad made some cold soba noodles to go with the sushi. And miso soup. Yum.

There were two of these platters. I think my parents were a bit scared at the amount of food I had made.


But somehow we managed to eat most of it. Of course.


Invest in a rice cooker. Seriously.

Monday 22 October 2012

Cream of Tomato Soup: Redux


Okay so get this: on Friday morning, I was rudely phone-alarmed awake for work, and it was completely dark outside. Dark. Outside. Like, night time. The sky outside was the same colour it was when I went to bed. That's never okay. Granted, it was 6 am, and we are rapidly approaching the tail-end of October. This happens every year, right? But for some reason I'm finding it hard to deal with this year.

And it's cold in the mornings! This is an outrage! It's colder now than I remember it being all last winter. This is partly because I have a terrible memory, and considerably less body fat than I did months ago. This, coupled with the nonexistent underwhelming UK summer this year means I've been cold since July.

But never mind all that now because it also means that SOUP SEASON is upon us!

Ahh soup, it's so just so easy. It gets made a lot in our home. Sometimes the tinned form makes an appearance too. Including those little red tins of Heinz cream of tomato. There was a certain point in my childhood where I was having cream of tomato soup with a grilled cheese sandwich for lunch every day.* I'm sure I wasn't the only one. So when I saw a discarded tin in our flat the other day, I wondered if I dared try to recreate a home-made version to have for lunch. A cream of tomato soup redux, if you will.

Well I did dare. And guess what? It turned out well. Really, really well. Oh my god, so well.


Do you want to hear the best part? Of course you do. There's no cream in it. I still have this book left over from my Vegan Days, and despite the woeful lack of food photos, it's one of the best cookbooks out there. I remembered there was a creamy tomato soup recipe in there. Score!

The secret to the creamy consistency is the humble potato (and the hand blender helps too, I guess), but I decided that I was using sweet potatoes. I also used sun dried tomatoes in oil (well-rinsed and dried for a bit in the oven) instead of the plain sun dried whole tomatoes the recipe explicitly called for. The soup turned out well despite these little alterations. I pretty much forced everyone who set foot in the flat this past weekend to try this soup, including a friend I hadn't seen in 8 years ("You're still a loon Sophs"). Anyway, the feedback was all positive so i'll be making this a lot. Let me know if you want the recipe. Or just go buy the Veganomicon. Even if you aren't vegan, or a fan of H.P. Lovecraft, it'll totally be worth your while.

*Okay, not every day. The tomato soup was in a rotation with split pea and clam chowder.

Monday 8 October 2012

Po-tay-toes, fried.


I went out to a work thing the other night. With drinks. Then I came home. There were lots of people in the house. Then I fell asleep in our alcove. Then I got woken up when everyone else was going to bed. Got into bed fully dressed. There are few things more gross than waking up at 10 in the morning in your jeans with the full lipstick-and-eyeliner things still happening on your face. Anyway, I woke up and I immediately wanted food. Something starchy. There's a surprise. Ideally I wanted noodles, but a) I always want noodles and b) our fridge and cupboards were woefully empty. No noodles for Sophie then.

There were three things in the fridge that were not condiments: onions, garlic, and potatoes. This meant I was going to have to bust out the pan and actually do some chopping. But I thought to myself: hey, I can work with these three ingredients. Because I'm German. Germans are good at potatoes. Especially at frying them in oil.


Granted, it's a pretty simple recipe, but the main reason I'm putting this up on das blog is that people often forget about the joys of fried potatoes. Also, you can pretty much make this for any meal. They're a stand-in for hash browns (breakfast), and obviously it's not difficult to imagine having them for lunch and dinner, maybe with a nice salad. Simon and I had them with veggie sausages the other night, because I was not allowed to make mashed potatoes for him.

The whiskey had nothing to do with this, I promise. Move along, people.

I had mine with cheapo supermarket coleslaw on that morning, which was alriiight but…. Okay I'll save the coleslaw rant for another day. Suffice to say it's high time I started making my own again.

You will need:

A pan. The bigger the better. It's not easy to achieve nice evenly browned potatoes in a tiny pan. You're constantly stirring to give all your little potato friends a chance to make direct contact with the pan, whilst at the same time trying not to turn them into a mushy mess from all that stirring.

Potatoes, halved lengthwise, then sliced thinly (see photo). The amount really is up to you. Who am I to tell you how many potatoes you want to eat? You gotta make your own choices once in awhile.

Onion. A really big one, halved, then sliced thinly. 

Garlic, minced. A whole bulb. No, just trust me on this. If you really are sceptical, then by all means just toss in 2-3 little segments worth. But you'll be depriving yourself of delicious garlicky potato goodness. Not my problem.

Olive oil

Pepper and salt, and some paprika to make it look pretty, and to make you feel better about eating yet another meal that is entirely brown. I'm only human.

How you do:

Pour a healthy glug of olive oil into the pan, whack in your sliced potatoes. Stir intermittently so that all the slices are coated and have a chance to fry. When the potatoes are just about starting to brown, throw in the onion and garlic. I recommend not doing it before then, otherwise the onions will start to go slightly black and charred… they just don't need to be in for as long as the taters. I learned this by doing it myself, as you may have noticed. Salt/pepper/paprika. Guten Appetit.

PS: We have food in the house now. All is well again.

Wednesday 29 August 2012

Let's talk about blueberry pie.


Actually, let's start off by talking about blueberries. I present you with an amalgamation of my blueberry-related memories/knowledge.


1) Does anybody remember the children's book 'Blueberries for Sal'*? That's what I think of every time I eat blueberries. Despite being written in the late 1940s, it was seemingly still super popular in the early 90s. Because I went to an American school until I was 7, and hung out with mainly American kids, this book was read to me at practically every sleepover I went to. It was also heavily reenacted by us in pretend play. Nobody ever wanted to be the bears.

*Quick plot summary for all the non-North Americans out there who have no idea what I'm on about: little Sal goes blueberry picking with her mum. At the same time, a bear cub and his mum are out eating berries in preparation for the winter. Sal and cub wander off, and both accidentally end up following the wrong mum. The book is for kids, so it obviously ends on a happy note, i.e. not realistically at all (which would probably be Sal getting mauled, bear cub getting shot with mum's Marlin rifle).

2) It is now widely known that in addition to being delicious, blueberries are also super healthy. As a preteen, I found out via my dad's Men's Health magazine that they're good for prostates. Great! I was then informed that I do not have a prostate. Never mind. Apparently they're a superfood for both boys and girls.

3) Blueberries are expensive in the UK. Wahhhh.

4) Blueberries make a lot of things more delicious. We all know this. Think pancakes, muffins, yoghurt, granola. Also, salad. Believe it.

5) Pie is also a great excuse to eat blueberries. Or is it the other way around? 

Whatever. Anyway. PIE.


The award for the best pie maker ever goes to my mum's good friend Kathy, who writes a darn good food blog with her siblings. She is the goddess of pie. And a few years ago she passed her pie knowledge onto my mum. Obviously I begged mum to teach me, too.

Here is how you pie. The link leads to Kathy's recipe for the crust. The rest is jotted down below.

Thank you Kathy!

Just an excuse to show off pretty nail polish from OPI's new Spiderman collection. 

For the filling:

- 4 cups blueberries ( Or any kind of fruit for that matter, if blueberry pie really isn't your thing. Frozen fruit works as well, by the way. Baking times will change though.)

- 1 cup sugar

- 1/4 cup cornflour

Assembly:

While the dough chills, prepare your filling by mixing the 3 ingredients together in a big bowl. Super easy, right?

Divide the dough into 2/3 for the bottom crust, and 1/3 for the top crust. Roll out the bottom crust on a well-floured surface, and ease it into a 9 or 10 inch pan. Trim the edges.


Next, pour the filling into the pan, distributing it evenly. Roll out the top crust and cover the pie with it, crimping the ends. Press together the edges further using fork tines. Sprinkle the top with water, then dust with some extra sugar.

My berries were frozen, which is why this looks somewhat odd.

Make a concentrical pattern in the top crust with a knife before sprinkling the sugar.

Bake at 220 degrees for the first 10 minutes, then at 190 degrees for 50 more minutes, or until the crust is golden.


The piece on the right is mine.
Mega props to my mum for helping with the photos ("MOOOOOOMCANYOUTAKEAPICTURE?").

Thursday 23 August 2012

Everybody must get sconed!


Hello from Northern Michigan! I'm making the most of these 10 days of freedom before heading back to London to start New Job. This involves being somewhat outdoorsy during the day, watching the Boardwalk Empire box set all night every night, and spending some time in the kitchen again. And assaulting you all with terrible Bob Dylan song lyric puns, apparently. Forgive me. It comes a bit too naturally when I'm around my dad. 

I've been coming Up North since I was tiny. It has everything a kid could possibly want - woods, wide open spaces, lakes, lots of other kids, and a place to play mini golf. Oh the memories. Not much here has changed over the past 22 years. Coming back is like travelling back in time, only now I'm a slightly taller kid who can drink, and drive a automatic car badly.* I still enjoy the mini golf (it's pirate themed, can you blame me?), and I still wander around in the woods. Only now I no longer pretend I'm Pocahontas.

What can I say, it's a special place. Aww. Anyway. Moving on.

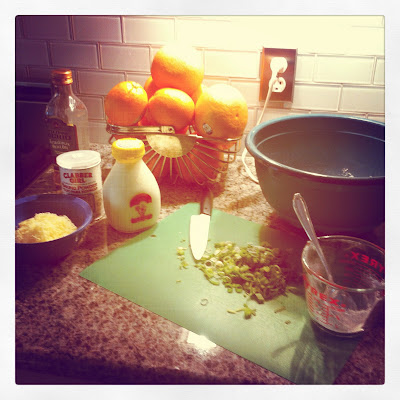
Let's make cheddar and spring onion scones! 

I wrote down this recipe ages ago from somewhere, but I altered it by making these savoury instead of sweet. An excellent idea, if I do say so myself. I reckon substituting cracked black pepper for the spring onions would also be yum. Just do yourself a favour and use mature cheddar. None of that "mild" crap. Gross.

Oh yeah, also, the camera broke. I took this as an excuse to use my dad's iPhone. Hello Instagram!

Hi.


You will need:

- 270 g all-purpose flour

- 1 1/4 tsp baking powder

- 3/4 tsp baking powder

- 1 tsp salt

- 2 tsp sugar

- 90 g cold unsalted butter, cut up

- 90 g mature cheddar cheese, grated

- 2 large spring onions, finely sliced

- 350 ml heavy cream


Preheat oven to 190 degrees celcius. Line a baking tray with wax paper, or grease it.

Combine the flour, baking powder, baking soda, salt and sugar together. Cut the cold butter into the mixture with a pastry blender (or your fingers) until it resembles coarse crumbs. Stir the cheese in. Add the cream and stir until the dough just comes together. Add the spring onion last, incorporate but don't overstir. 


With your hands, drop palm-sized mounds of dough onto the tray, leaving enough room in between the scones. Bake until golden brown, for approximately 20 minutes. Let the scones cool on a wire rack until the are warm before eating.


*(Disclaimer: I obviously don't do these things at the same time. Don't drink and drive. Or whatever the message is that I'm supposed to put here.)

Sunday 12 August 2012

The one where I show you how to make peanut butter cups.


Hello! Still not hugely big on cooking right now, but this weekend I was having an all-encompassing craving for something peanut butter-and-chocolate-esque, and I thought that I should probably take that and run with it. 

This is basically one big excuse to make something that looks and tastes vaguely like a peanut butter cup. When I was 10, I ate five of those things in one go (that's two and a half packs, kids). And then I got on my bike, rode home and had dinner. And them I probably ate the leftover pb cup for dessert, while watching Nickelodeon. Ahh, to be a bottomless pit again…… Anyway, my point is that I really really like peanut butter cups, and they were all I wanted to eat after getting home at 1am on Saturday morning. 

At around 3pm, they became a reality. I don't think you guys fully comprehend that this is the most effort I have put into making something edible since LATE JUNE (that totally deserved caps lock). Still, I wanted something that didn't need baking, where measuring was optional, and where no separating of eggs, endless mixing and shaving of chocolate into tiny microscopic pieces was required. My bullshit tolerance for the summer has been saturated. I wasn't about to fanny around with 2-page recipes.

So without further ado, I give you the peanut butter cup recipe in a few easy steps.

First, stuff you will need. Roughly.

- 140 g peanut butter (Skippy isn't allowed. Use real peanut butter.)

- 50 g of some sort of granulated sweetener (the obvious answer here is sugar, but some people might prefer to use artificial granulated sweetener, or there's this cool stuff called maple sugar and it's apparently better for you but probably only available at Wholefoods where they'll charge you £20 and claim to your firstborn.)

- 110 g butter, or some sort of spread

- 8-10 digestive biscuits, smooshed into crumbs (I recommend the freezer-bag-and-blunt-object method)

- 150 g chocolate (I've only ever used dark chocolate, but since Reese's pb cups are traditionally milk chocolate coated, who the hell am I to argue if you want to do that?)

- 60 mL milk/soy milk

- a muffin tin

- muffin cups

Ignore the agave syrup. I decided granulated sweetener would be better since I didn't want to make it runny. But by all means, try it and tell me how it turns out.


Step 1: Melt the butter in a saucepan over medium heat. 

Step 2: Stir in the peanut butter, biscuit crumbs and sugar and mix well.

Step 3: Remove the mix from heat and evenly divide amongst the muffin cups.

Step 4: In a pan over medium heat, melt the chocolate, stirring in the milk bit by bit. The mixture shouldn't be too runny, so adding the liquid slowly should prevent that. And if you screw up, you can always add more chocolate to thicken it.

Step 5: Spoon the chocolate evenly over the peanut butter mixture.

Step 6: Stick your little babies in the fridge for at least an hour.

Step 7: While you wait, stick on the Forrest Gump soundtrack and have a little sing and dance-along. Entirely optional, but highly recommended.

Step 8: Insert into face.


*I feel I should mention that these have been given the thumbs up by two people who do not actually like peanut butter (HI MELIE AND TOM). For this reason alone you should go and make them. If people who hate peanut butter enjoy eating these, well then I must have created food that everyone loves and nobody can refuse. Right? You're welcome.